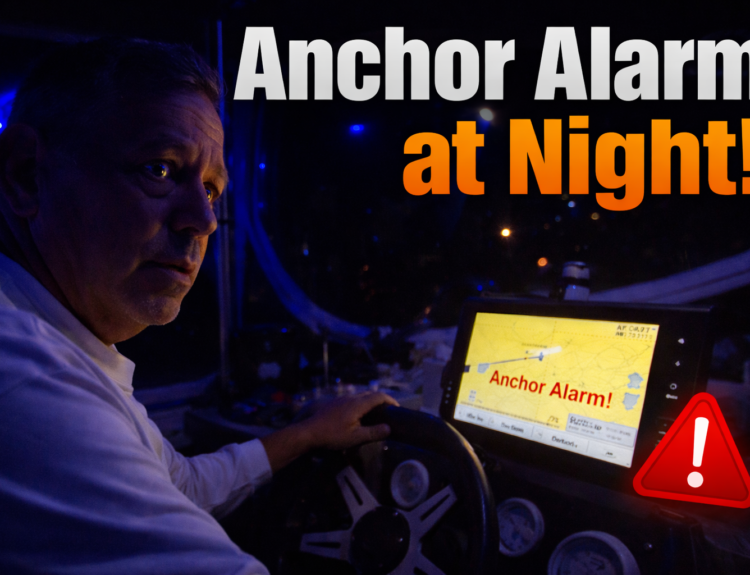
Introduction
If you’re planning the Great Loop or just want quieter nights on the hook, a solid boat solar system is a game changer. In this article I’ll walk you through how I installed an Eco-Worthy solar kit on my cruiser, tied it into a 300Ah lithium battery bank, and connected a 2000W pure sine wave inverter so I can run my refrigerator, crock pot, and even an electric trolling motor.
This is the practical follow-up to my article on wiring batteries in series vs. parallel (link to that article here). There I talk about the theory; here I show you the real-world install.
Why I Chose a Complete Eco-Worthy Solar Kit
You can build a system by buying panels, charge controller, cables, fuses, and inverters one piece at a time. The problem is, it’s really easy to miss a connector, wrong-size cable, or incompatible part.
The Eco-Worthy kit solved that. In one box I got:
-
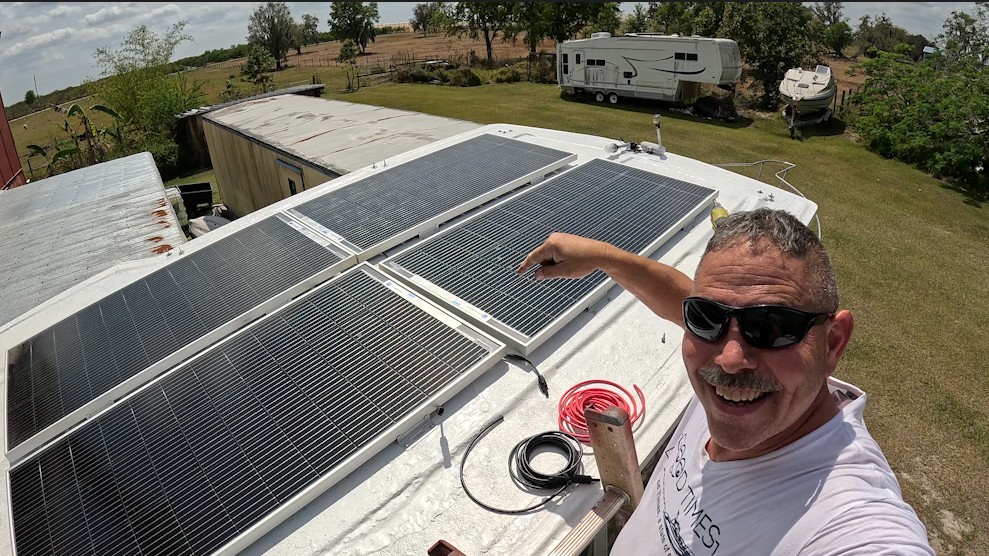
4 × 195W 12V solar panels
-
MPPT charge controller
-
Remote display
-
2000W pure sine wave inverter
-
Pre-cut cables and MC4 connectors
-
Mounting brackets and stainless hardware
Half the battle is having everything you need on hand so you’re not stuck mid-install running back to the store.
Planning the Hardtop Layout
I built my own hardtop with plywood underneath specifically so I’d have something solid to screw into. Before drilling anything, I:
-
Laid the panels out on the top
-
Left space for my Starlink mount
-
Marked where the L-brackets needed to land so the screws would hit “meat”
-
Thought through where the wiring would come together and where the cables would enter the cabin
The key is to think about the panel layout and cable path at the same time. Once the panels are mounted, you don’t want to realize the wires are six inches short.
Mounting the Solar Panels
The Eco-Worthy kit includes L-brackets and stainless, self-tapping screws with weather washers. I pre-assembled the brackets on the panels first, making sure the “feet” pointed the right way so the wiring could run underneath.
Mounting tips:
-
Use the supplied stainless self-tappers with the rubber/metal washers
-
Don’t over-tighten and crush the plywood or fiberglass
-
Keep panels as close together as practical but leave enough room to get a wrench on the brackets
-
Think about wind load – this top will see plenty of breeze on the Loop
Once everything was lined up, I carried the panels up (carefully!) and set them in place for the final screw-down.
Wiring the Panels in Parallel
For this build I wired all four panels in parallel, just like I showed earlier with the battery diagrams. Parallel keeps the voltage at 12V while adding up the current from each panel.
The kit includes Y-splitters / branch connectors:
-
One set ties the “left” leads together
-
Another set ties the “right” leads together
-
Each side ends up with one positive and one negative coming off of the roof
The connectors are male/female MC4s, so as long as you don’t plug a cable back into itself, it’s hard to get wrong. When you’re done, you should have one positive and one negative pair ready to go down to the charge controller.
Running Cables Through the Roof
To keep things clean and dry, I drilled a single hole just big enough for the solar cable and the Starlink cable, then covered it with a clamshell deck fitting.
-
Cables run from the panel junction area to the clamshell
-
Drop down inside the cabin behind a life-jacket hook so you hardly see them
-
Sealant under the clamshell keeps water out
From there, the solar positive and negative run straight to the charge controller.
Charge Controller, Batteries, and Inverter
The charge controller has three clearly marked sets of terminals:
-
PV – from the solar panels
-
Battery – to the lithium bank
-
Load – optional, if you want to power DC loads directly
I already had battery cables run, so it was just a matter of cutting, stripping, and landing the wires in the right places: PV positive/negative, battery positive/negative.
From the battery bank, heavy cables feed the 2000W pure sine wave inverter and then on to an AC selector switch. That switch lets me choose:
-
Shore/generator power
-
Inverter power from the batteries
This way I can keep the refrigerator on underway, run a crock pot while I cruise, and still plug into shore power or a generator at night.
Building the Lithium Battery Bank in Parallel
My batteries live in an unused storage area that turned out perfect for a battery bay. I’m running:
-
3 × 100Ah lithium batteries now (300Ah total)
-
Space for a fourth battery for 400Ah later
Because I want to stay at 12V but increase amp-hours, I wired the batteries in parallel:
-
Red to red to red (all positive posts linked)
-
Black to black to black (all negative posts linked)
This keeps everything 12V and simply increases how long I can run loads. I always:
-
Connect positives first, then negatives
-
Tighten every connection with a wrench
-
Double-check there are no loose lugs that could arc
How I’ll Use This System on the Great Loop
This solar and battery setup lets me:
-
Keep the fridge cold without always running a generator
-
Cook underway with a crock pot powered by the inverter
-
Experiment with an electric trolling motor/outdrive on slow-moving canals like the Erie Canal and the Tenn-Tom, using the big lithium bank as the fuel tank
-
Always have a backup charging source – if one battery goes bad or the alternator quits, the solar keeps me in the game
All in, I’m around $2,500 for panels, batteries, inverter, and hardware. For the peace of mind and flexibility it gives on the water, I’d do it again in a heartbeat.
Want to Understand the Wiring Choices?
If you’re wondering why I chose to wire the batteries in parallel instead of series, check out my companion article:
“Series vs Parallel Batteries: What’s Best for Boats, RVs & Off-Grid Solar?”
That article breaks down the theory with diagrams, while this one shows the practical install.
Final Thoughts
If you’ve been thinking, “I’d love solar on my boat, but it looks complicated,” I hope this shows that with a good kit and some planning, it’s absolutely a DIY project. Take your time, lay it out, and follow the wiring step by step — and you’ll be running quiet, sun-powered days on the water too.